Cuedesk
Cuedesk is a customer service platform that supports AI Agents, live chat, and broadcasts. By integrating a DRUID AI Agent with Cuedesk, you can manage user conversations within Cuedesk-supported channels, such as WhatsApp and Facebook Messenger.
Prerequisites
Before you begin the integration process, ensure you have the following:
- Cuedesk Account: A Cuedesk user account in your company's workspace with the Workspace Owner and Flow Manager roles. If you plan to manage tickets, you also need the Agent role. For more information, see the Cue documentation.
- Channel Setup: The required channel (WhatsApp, Facebook Messenger, or Cuedesk web channel) must be configured in your Cuedesk workspace.
Integrating your AI Agent with Cuedesk
To integrate the AI Agent with Cuedesk, follow these steps:
Step 1. Create Cuedesk API Key and Webhooks
You need to create an API key (Bearer token) and two webhooks (Inbound and Outbound) in your Cuedesk workspace.
Create an API Key
- Sign in to app.cuedesk.com.
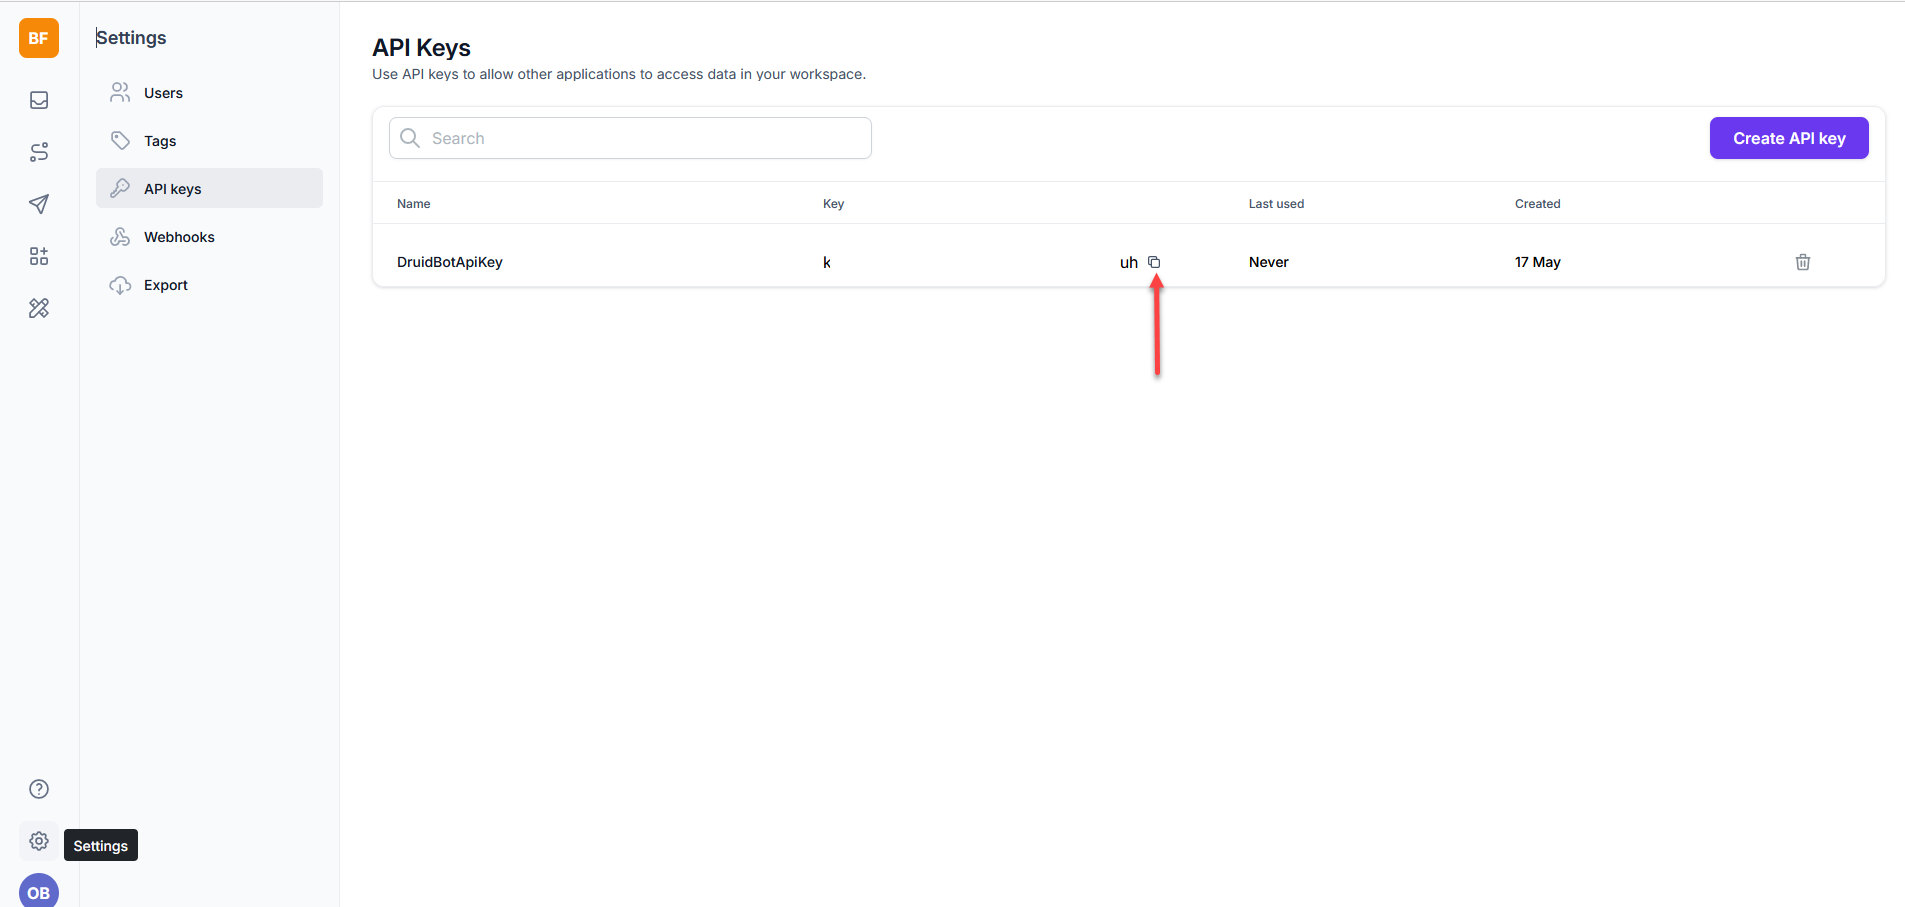
- On the main menu, select Settings > API Keys.
- On the API Keys page, click Create API key.
- In the pop-up, enter a descriptive name for the key and click Create.
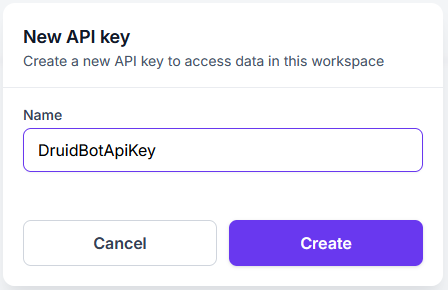
Cuedesk generates the key (Bearer token). Copy this key; you will need it later in the Druid Portal.
Create Inbound Webhook
This webhook sends new incoming messages from the user to the DRUID AI Agent.
- On the Settings menu, click Webhooks.
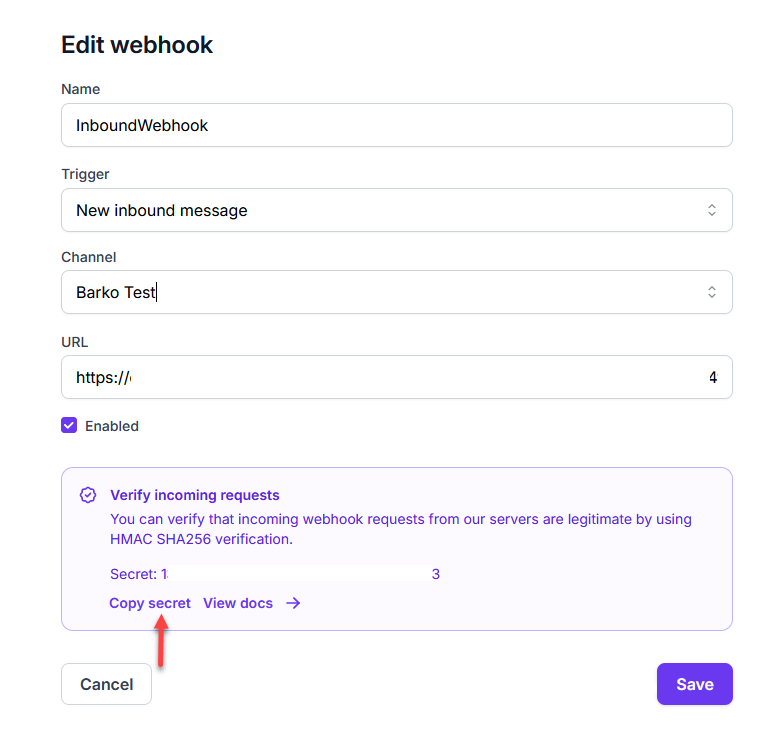
- Click Create Webhook and configure the Inbound webhook:
- Webhook Name: Enter a name (e.g., DRUID_Inbound_Messages).
- Trigger (dropdown): Select New inbound message.
- Channel (dropdown): Select the activated WhatsApp/Facebook Messenger channel.
- URL: Enter the CallBack URL for Inbound messages. To get the URL, follow these steps:
- Log in to the Druid Portal and select your AI Agent.
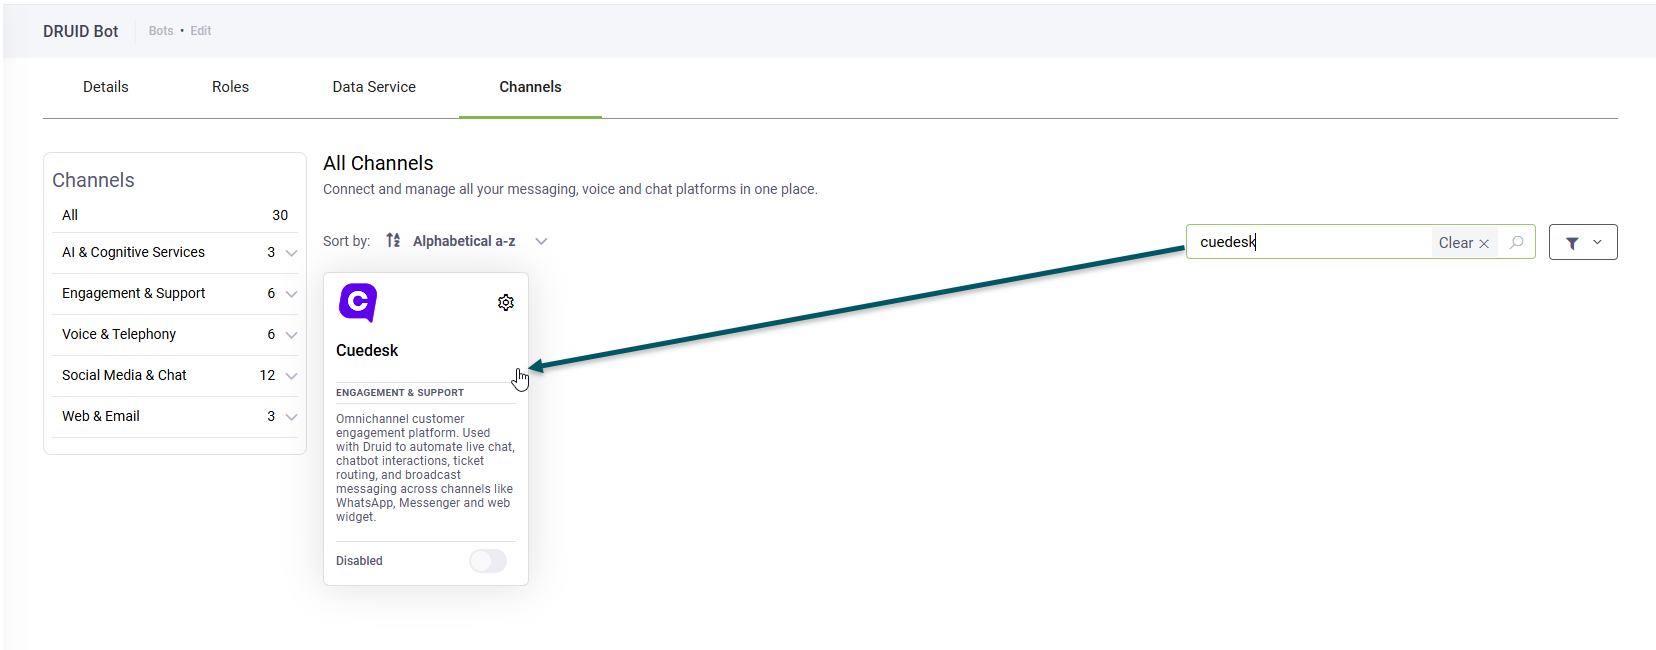
- Click the Channels tab.
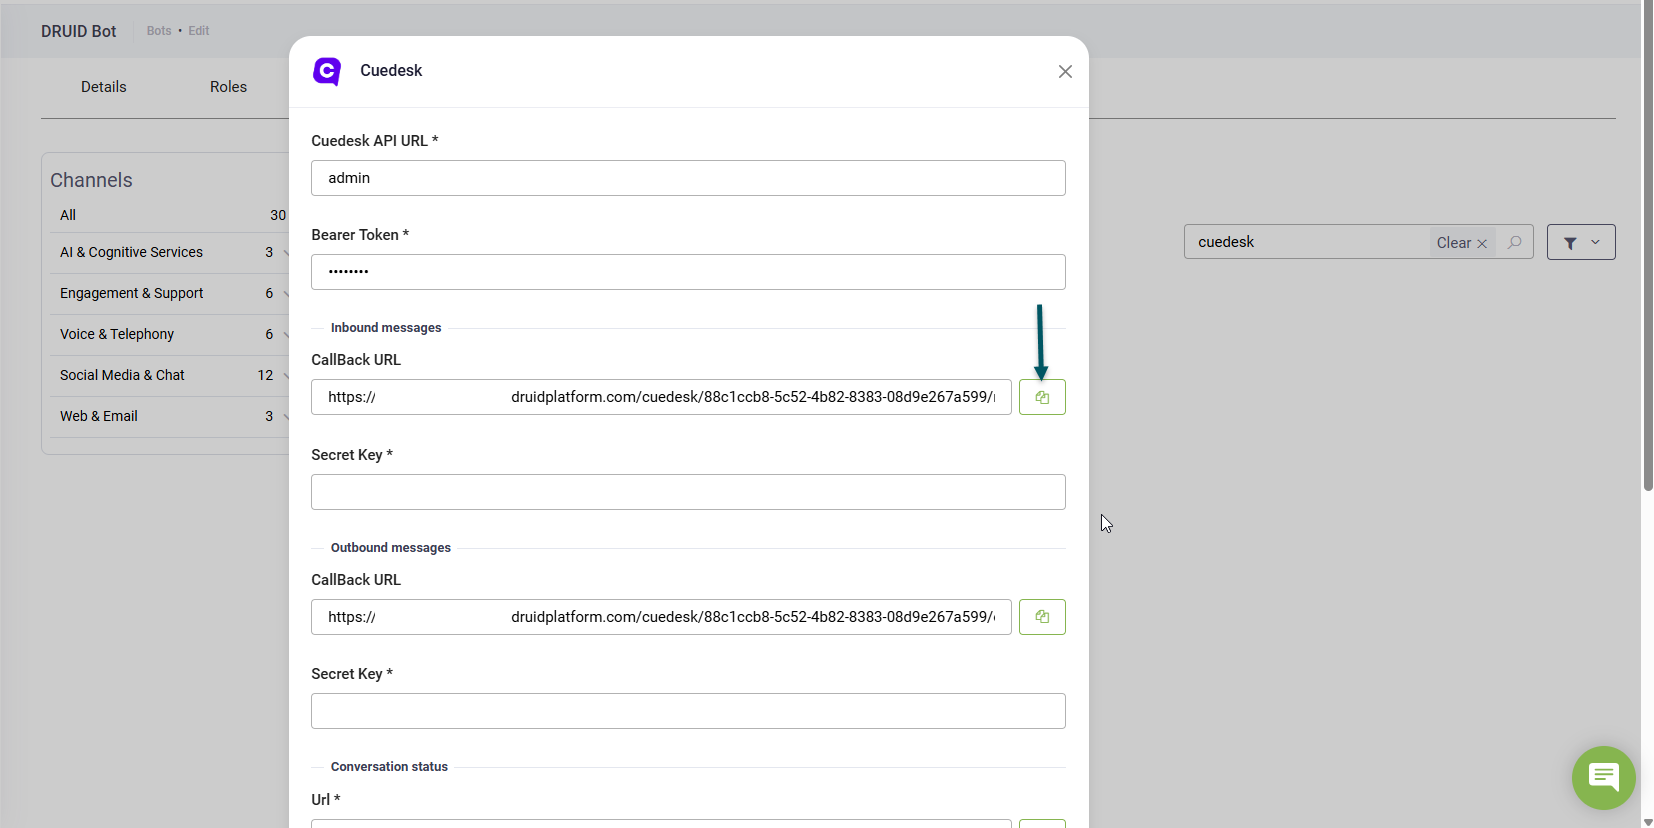
- Search for 'cuedesk' and click the Cuedesk card.
- In the channel configuration modal, under the Inbound messages section, copy the CallBack URL.
- Click Create.
- Click the newly created Inbound webhook and copy the secret. You will need this secret in the Druid Portal.
Create Outbound Webhook
This webhook ensures the Druid AI Agent can send messages back to the user through Cuedesk.
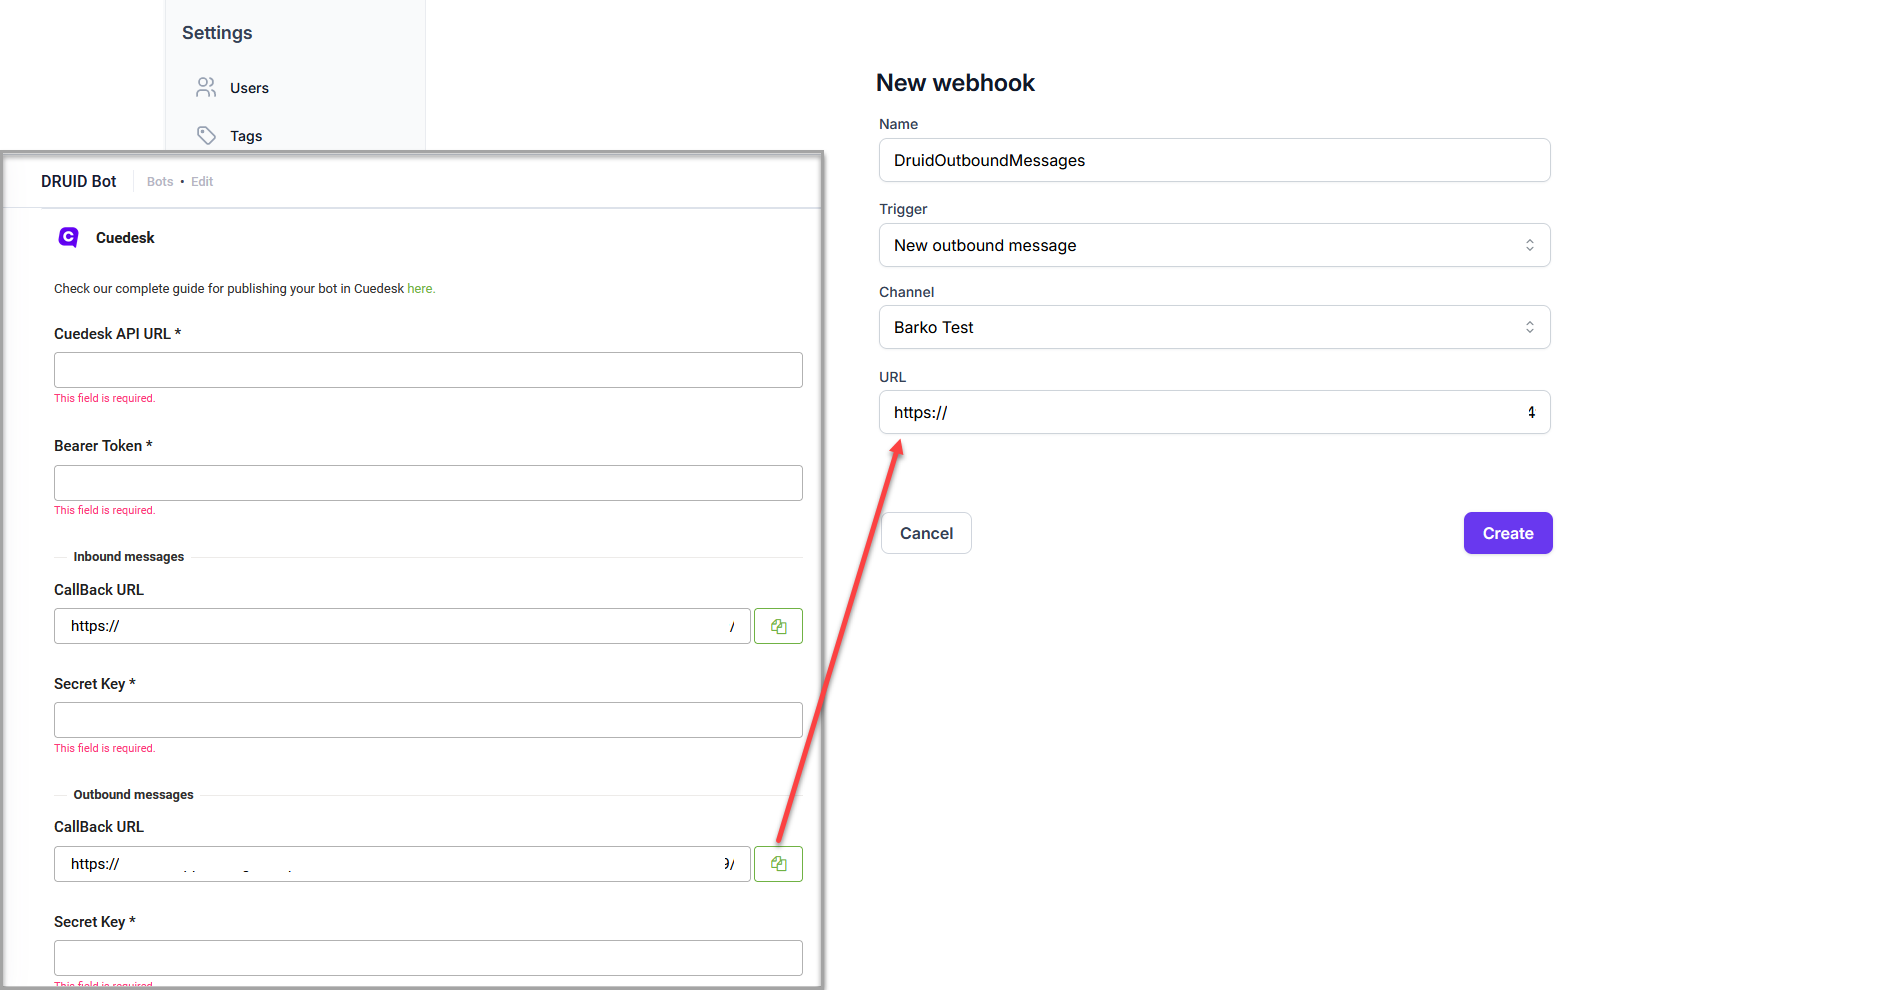
- Click Create Webhook again and configure the Outbound webhook:
- Webhook Name: Enter a name (e.g., DRUID_Outbound_Messages).
- Trigger (dropdown): Select New outbound message.
- Channel (dropdown): Select the activated WhatsApp/Facebook Messenger channel.
- URL: Enter the CallBack URL for Outbound messages. To get the URL, follow these steps:
- Log in to the Druid Portal and select your AI Agent.
- Click the Channels tab.
- Search for 'cuedesk' and click the Cuedesk card.
- In the channel configuration modal, under the Outbound messages section, copy the CallBack URL.
- Click Create.
- Click the newly created Onbound webhook and copy the secret. You will need this secret in the Druid Portal.
Step 2. Configure the Cuedesk channel in the Druid Portal
- Log in to the Druid Portal and select your AI Agent.
- Click the Channels tab.
- Search for 'cuedesk' and click the Cuedesk card.
- Enter the required connection details:
- Cuedesk API URL: Enter https://api.cuedesk.com/v1/messages.
- Bearer token: Paste the API key you copied from the Cuedesk workspace.
- Inbound messages > Secret Key: Paste the secret for the Inbound webhook
- Outbound messages > Secret Key: Paste the secret for the Outbound webhook.
- Click the Publish button and wait for the channel to activate.
Step 3. Create Cuedesk Flows for AI Agent Integration
After activating the channel, you must create two flows in your Cuedesk workspace to manage the conversation lifecycle.
Create New Conversation Flow
The New Conversation flow directs all new user messages to the DRUID AI Agent for handling. To create this flow:
- Download the New-Conversation-Sample-Flow. This sample flow is designed for the WhatsApp channel but you can update it for Facebook Messenger.
- In the Cue workspace, click the Flows icon on the main menu.
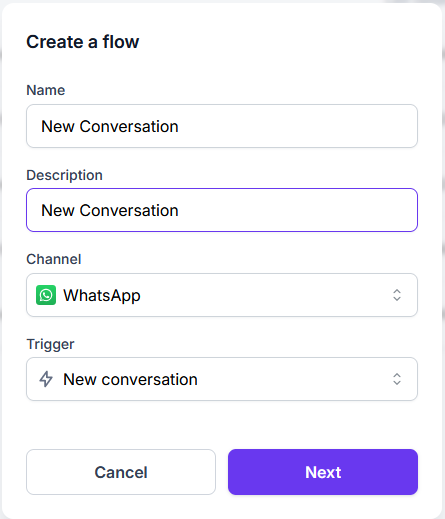
- On the Flows page, click Create a flow.
- Provide a flow name and description, select the channel and from the Trigger dropdown list, select New conversation.
-
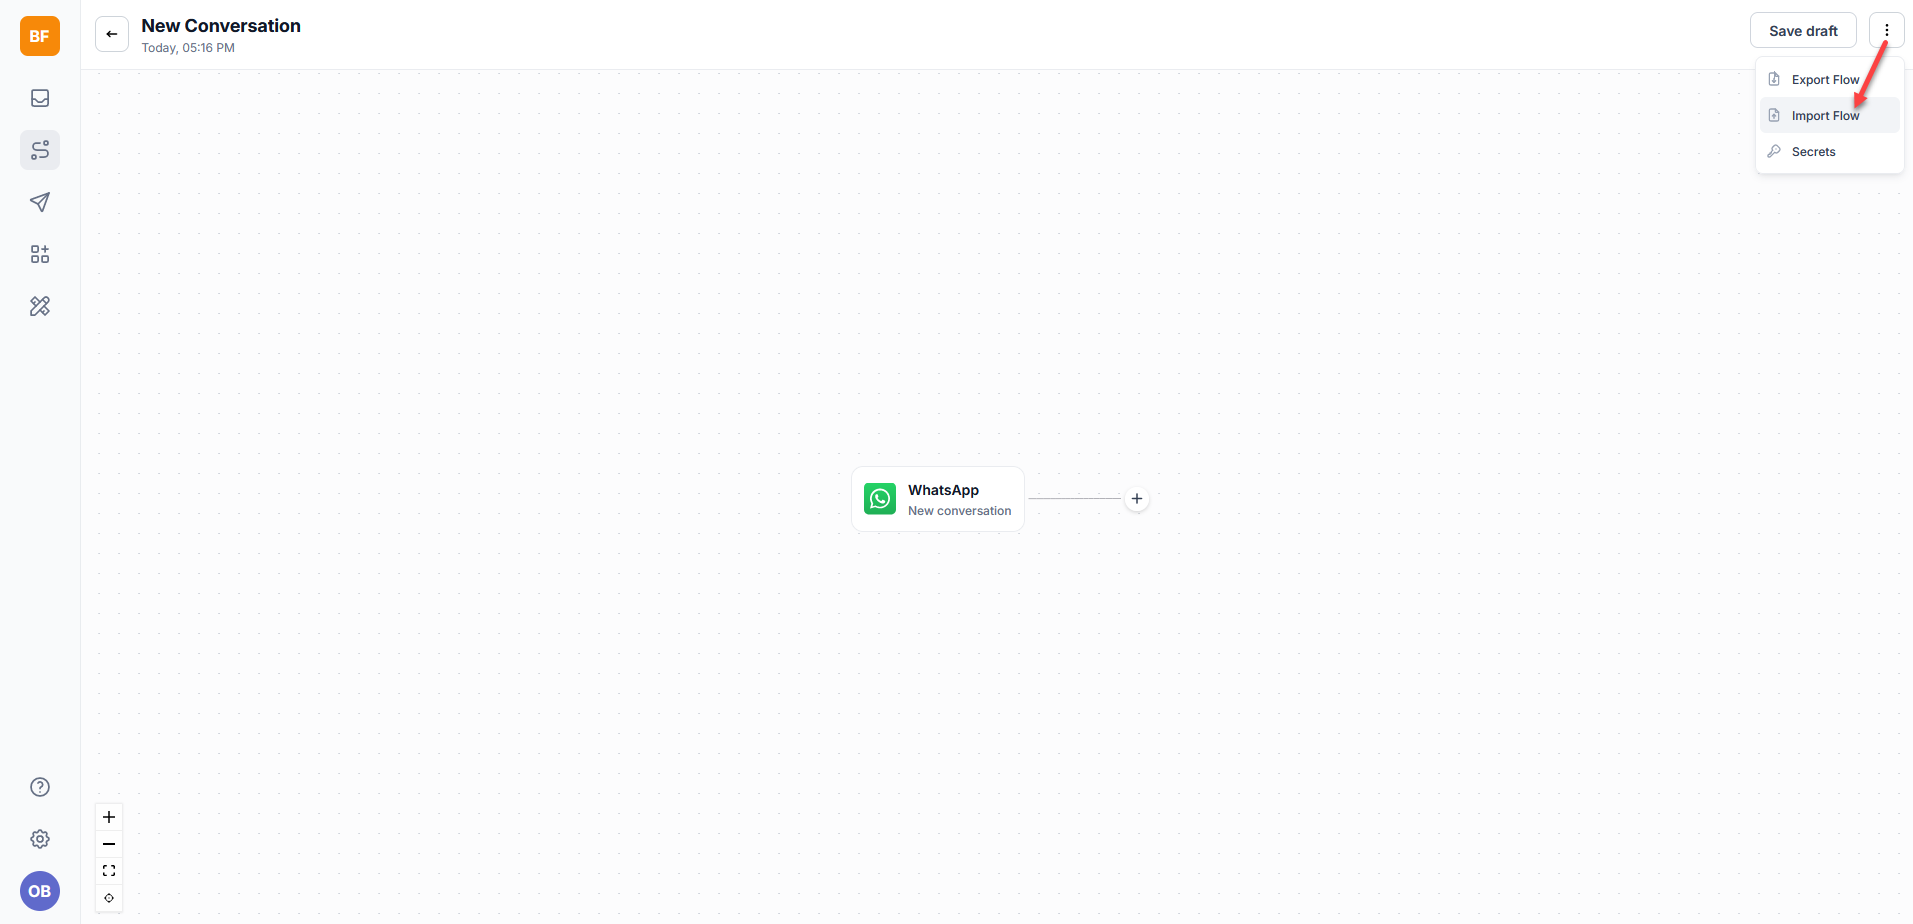
Click Next to open the flow diagram.
- Click the three dots at the top-right corner and select Import Flow.
- Select the 'New-Conversation-Sample-Flow' you downloaded.
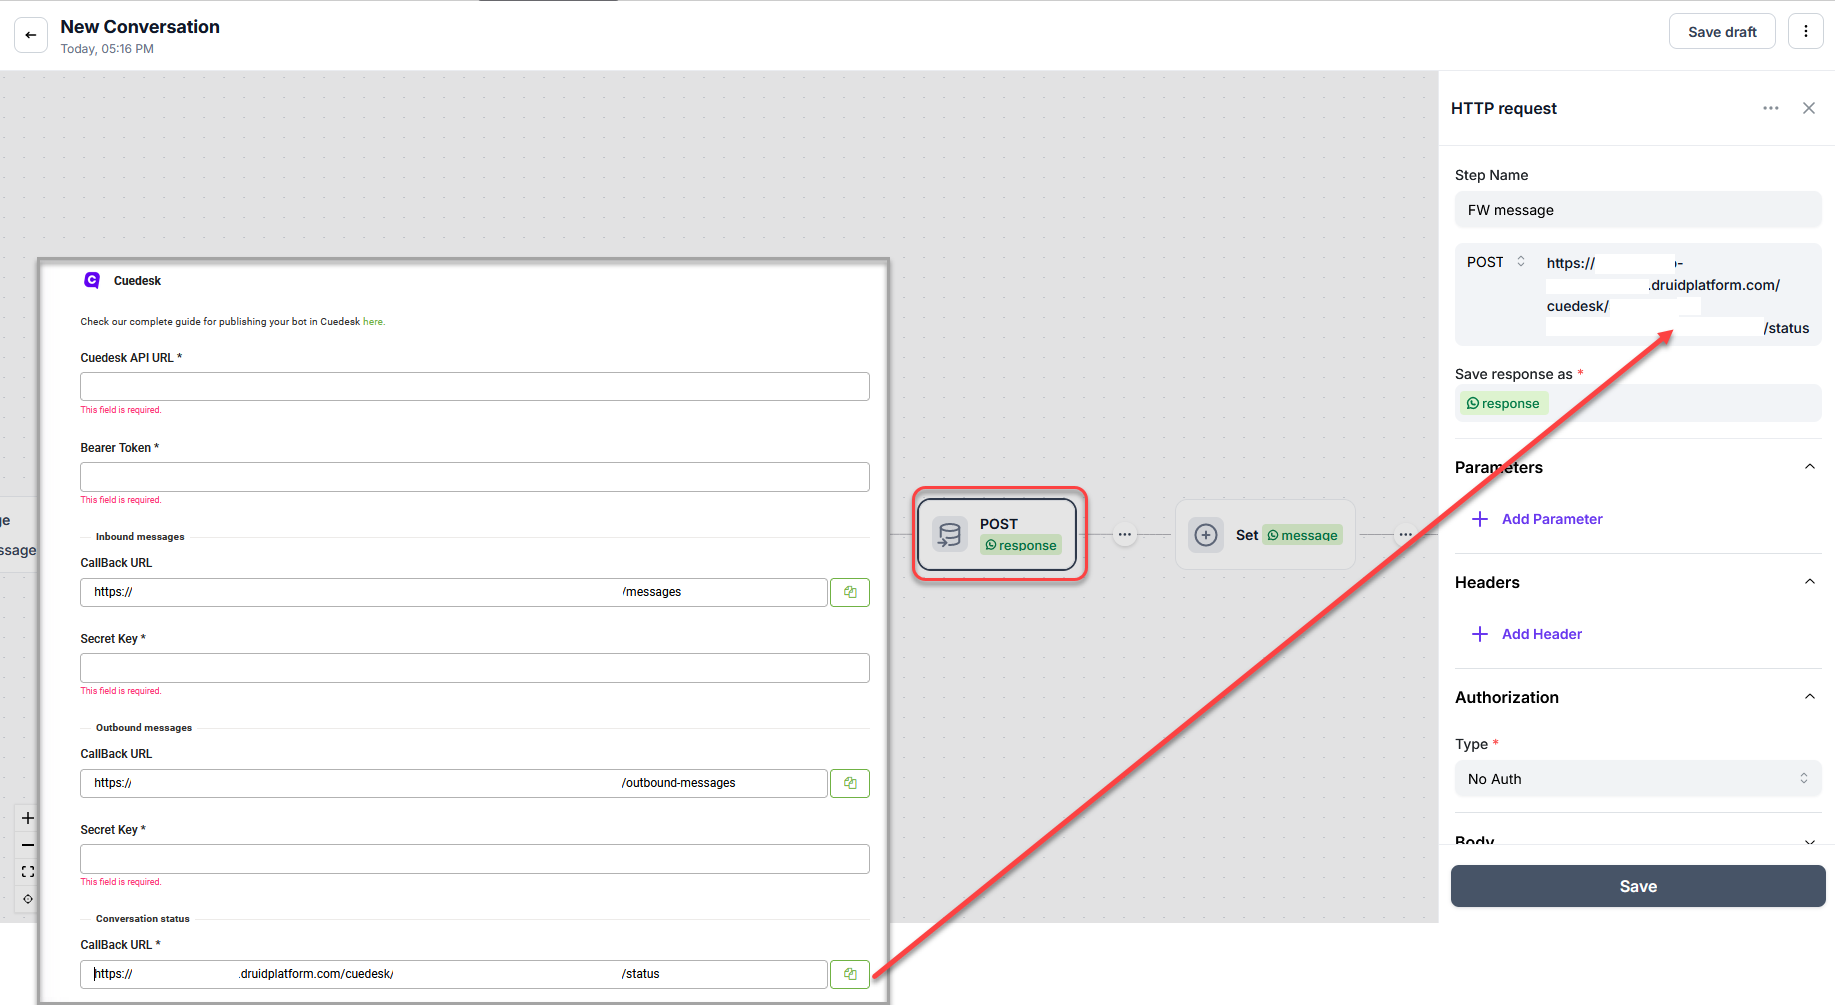
- Click on the POST step and in the URL enter the Conversation status CallBack URL. Get this URL from the Cuedesk channel settings, under the section Conversation status.
- In the POST step, click the Body section and replace the value of the "to" property with the Channel ID of the channel you are using. To find the channel ID, on the Cuedesk workspace menu, click Channels and copy the channel ID for the desired channel you're using in the flow.
- Save the step.

Create Live Chat Ticket Closed Flow
This flow ensures the conversation returns to the DRUID AI Agent after a live agent closes a ticket.
- In the Cuedesk workspace, click Create a flow.
- Provide a name, description, and select the channel.
- From the Trigger dropdown list, select Live chat ticket closed.
- Design the flow logic to notify DRUID that the agent session has ended (typically by sending a message back to the DRUID endpoint).
- Save the flow.
Assigning tickets to specific Cuedesk queues
The DRUID AI Agent uses the internal action ConnectToHelpdeskAgent to transfer the user to Cue Live Chat. A ticket is created in the Cue Inbox. To assign tickets directly to a designated Cuedesk queue, use the internal action ConnectToHelpdeskAgent and provide the name of the desired Cuedesk queue as a string value within the QueueCode parameter.
Receiving and Processing Voice Messages
DRUID supports audio messages only through Microsoft Cognitive Services and ElevenLabs. For Microsoft Cognitive Services, it supports all languages available in the Azure Speech Service. For a complete list of supported languages, refer to Language and Voice Support for the Speech Service.
Here's how it works:
- Receive audio messages. When a user sends an audio message via Cuedesk, the AI Agent will:
- Process the audio recording using Azure Speech resources configured in the channel settings.
- Recognize the language for Speech-To-Text (STT) based on the user's language ([[ChatUser]].Language).
- Log in the Conversation History the user message type as 'Audio Recording'.
- Process audio. The AI Agent:
- Converts the audio message to text using Microsoft Cognitive Services/ElevenLabs.
- Uses the converted text to predict the next conversational step.
- Respond. By default, the AI Agent will respond to voice messages with text. You can choose the AI Agent to reply with voice.
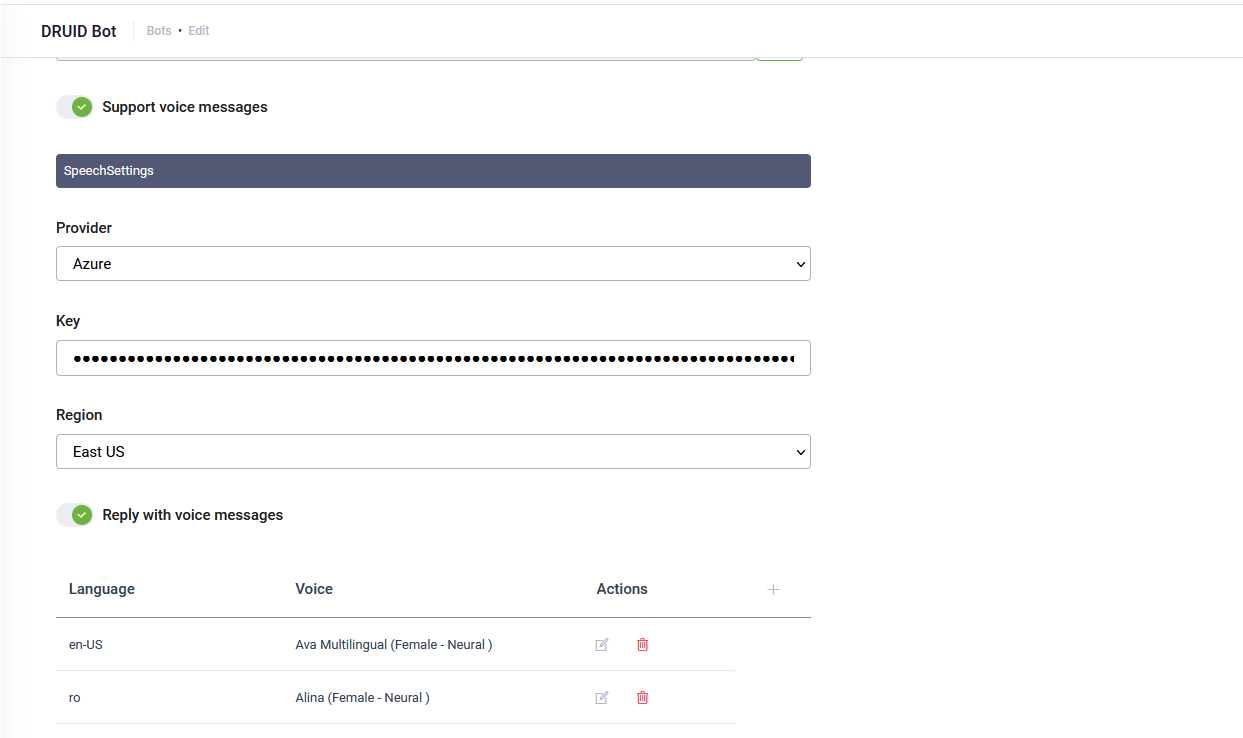
To enable voice messages support, follow these steps:
- In the channel configuration page, tap on Support voice messages.
- Select the Speech provider (either Azure or ElevenLabs), then enter the required details:
- For Azure, enter your MS Azure Speech API key and select the region.
- For ElevenLabs, enter your API key.
- By default, the AI Agent replies with text. To have the AI Agent respond with voice, turn on the Reply with voice messages toggle.
- In the table, click the plus icon. A row is added to the table.
- From the Language dropdown list, select the AI Agent language (default or additional) and from the Voice drop-down, select the human-like neural or standard voice the AI Agent will use to respond to the user.
- Click the Save icon displayed inline. You can add more languages and different voices per language as best suits your needs.
- If the channel has not been published yet, click Publish, otherwise, click Save.